Saturday, 13 April 2013

Burrs Galore!

Due to work and other personal commitments, I have not played with or reviewed any puzzles for a while. But during the last several weeks, a number of new wooden burr puzzles arrived, the latest batch from Jakub and Jaroslav Dvorak of Pelikan and Eric Fuller's Cubicdissection.


Clockwise from top left: Unassembled Vectes/Ghidorah (Yavuz Demirhan/Alfons Eyckmans),
Triaxe (Stephane Chomine), Estergon 2 (Yavuz Demirhan),
Columnata 2P3C (Yavuz Demirhan), Cockpit (Osanori Yamamoto),
Ice Pillar (Osanori Yamamoto), unassembled Four Cross Twelve (Guy Brette),
Derek's Half Dozen (Derek Bosch), Centre: unassembled 2-In-1 (Oskar Van Deventer)
Now what was I thinking when I ordered so many puzzles, I am now wondering to myself. Well, for one, I was attracted by some of the very colourful woods used, for example, Eric Fuller's 2-In-1 which uses 12 species of exotic hardwoods. Another reason being I wanted to have a bit more hands-on play with burrs, since I don't own many of them (and absolutely lousy with burrs!)....hmm, but now I am not so sure after looking at this complicated stash.

Virtually all of these are "super expert" level and "many-many-moves-before-the-first piece-can-be-removed" type burrs and interlocking puzzles. I am not even sure which one of these wooden beauties to start with. I still have a backlog of other puzzles which I have yet to touch beyond their unwrapping. If anyone has any suggestions, please feel free to comment.

I think I have bitten off a lot lot more than I can chew. But knowing myself, I would not unduly labour and lose sleep over a puzzle beyond a certain amount of time. I will still enjoy the exploration process of trying to it take apart and re-assembly even if I can't solve the damn thing. So we'll see how it goes with this lot of ten in the weeks, months (or years) to come.

Sunday, 24 March 2013

Twin Box Pentominoes


Name
Twin Box Pentominoes

Designer
Primitivo F. Ramos. He also designed the Pack The Podium puzzle, featured on Puzzle Place.


Manufacturer
Brian Menold. Online retail shop Wood Wonders. Special limited edition of four copies each priced at US$58. Currently unavailable.

Type & Classification
Pentominoes 3D Packing Puzzle

Dimensions
8.7cm (Length) 8.7x cm (Width) x 6.9cm (Height).

Materials & Construction
The outer box frame sides are made from Paduak while the corners are English Sycamore. The pentominoes are Yellowheart. Construction fit and finish is excellent. The pentominoes fit well and slide smoothly. But because the tolerances are very tight, this puzzle may "lock up" in very humid conditions, as did mine. But half a day or so in a camera dry box solved the problem.

Overview
Twin Pentominoes is my second puzzle from Brian Menold. The first is Stacks Of Sticks reviewed earlier in this blog. A very attractive and aesthetically pleasing puzzle. The choice of exotic hard woods creates a very nice colourful contrast, particularly the orange Paduak frame and the Yellowheart pentominoes. Probably this was what attracted me to this puzzle in the first place. Brian made a short run of four copies, each with a combination of different woods but I think this version is perhaps the most striking. This is a fairly large puzzle and feels quite a handful in the palm.

The object is to remove the pentominoes from the frame and reassemble them within. I had read from fellow puzzle blogger Kevin Sadler's blog review that the Twin Box is a very difficult packing puzzle and even he couldn't solve it without help. And so I found out the same for myself as I started to remove each piece. After the first several pieces, I knew straight away I would have a lot of trouble getting them back into the frame later. I was already getting confused by the different orientations of the box as I slid the pieces around and then out of the confines of the box.  Some pieces even had to be moved two together at the same time to be extracted.

Numbering the pieces but still of little use at the end
I decided to mark and number each piece. I even took photos and notes of how each piece slid out on my iPad, hoping this will allow for easier assembly later. But as I discovered later, I had missed a step or two during the numbering, and well...everything came out and was in a mess. All my efforts to document the disassembly for future assembly had been futile.

Re-assembly proved virtually impossible for me. Each time I could get no more than four to five pentominoes into the box before getting stuck. Finally I sought the help of Kevin and he immediately obliged by sending over the solution he obtained using Burr Tools. There is a staggering 11,821 solutions! Difficult to imagine that with thousands of solutions, the puzzle is still so difficult. With the help of the programme, I eventually got the pieces back into the frame in the right sequence...Whew! Using Burr Tools, I also found some solutions which are easier to execute than others.

Difficulty Level
Just two words....extremely difficult!

Summary
A really very nice and well-made puzzle. The colours catch everyone's attention. For the workmanship that went into it, very good value for money too. And if you want a really gruelling and ultra challenging puzzling experience (and sleepless nights), the Twin Box will also not disappoint!

Wednesday, 13 March 2013

A Drive Down Lombard Street


Name
A Drive Down Lombard Street

Designer
Brian Young


Manufacturer
Brian Young. Puzzle directly available from him via his website Mr Puzzle Australia priced at A$70/-

Type & Classification
Dexterity & Sliding

Dimensions
14.4cm (Length) x 7.6cm (Width) x 3.7cm (Height).

Materials & Construction
The box is made of Papua New Guinean Rosewood, six sliding tiles made from Western Australia Jarrah, acrylic and steel. Construction fit and finish is to a very high standard. The tiles fit well and slide smoothly. There is enough "gap" between the tiles so humidity would not be an issue for this puzzle.

IPP
The Drive Down Lombard Street was Brian's Exchange Puzzle during IPP29 in San Francisco, USA in August 2009. Like most of Brian's exchange puzzles, this one is a themed puzzle inspired by the popular tourist attraction, Lombard Street in San Francisco, which is the world's most crookedest street.

Overview
The object of the puzzle is to "take a drive down Lombard Street"; manoeuvring a ball bearing from tile to tile at the starting point on top, ie Hyde Street down to the bottom end point, Leavensworth Street. Each of the six tiles have grooves and notches cut into them to allow the ball bearing to roll atop each tile and to move from one to the next. All the six tiles are also able to move or slide, similar to a regular sliding puzzle. The tiles are covered by acrylic so you cannot physically touch them but must use dexterity in order to move them around within the confines of the box.

Solving the puzzle requires one not only the use dexterity to move the ball bearing from tile to tile, but also  the tiles need to be in the correct orientation to enable the grooves to be aligned properly for the ball bearing to roll from one tile to the next. Basically slide/move the tiles to form a maze with the grooves and navigate the ball bearing through the maze. To make things even harder, the grooves on each tile are cut differently so forming the maze is not that simple.

And because there is a one empty space to allow the tiles to slide, the ball bearing can quite easily fall off a tile (if one is not careful during the sliding  process) to the bottom of the box. I think Brian also deliberately made the grooves shallow enough to allow this to happen to make the puzzle harder. Here you have to reposition the ball bearing on the starting point again and begin all over.

Difficulty Level
The puzzle provides a fair amount of challenge but is not very difficult. Yes, it requires dexterity and some thinking to get the tiles in the right positions. I took about twenty minutes to get from start to finish, with several falls and re-starts in between. After a while you will get the hang of it and you can quite easily prevent the ball bearing from dropping over the side as you move the tiles around.

Brian states that the "ultimate solution" is one with the least dexterity required; with minimal tile movement. I am not sure if I solved it with less or more steps than what he intended as I was just focused on getting the ball bearing to the end point. But his solution sheet requires a minimum of fourteen steps, and this is only after certain tiles are already in the right starting position.

Summary
The Drive Down Lombard Street provides a nice and different twist to the usual sliding puzzle genre in that there is also a dexterity element thrown in. It doesn't take too long to solve. But more importantly, I think its a pretty fun puzzle to spend time with.

Sunday, 10 March 2013

Crystal Puzzle Skull

NOTE: If you want the instructions for the skull, please email me using my blog email in my profile.

Name
Crystal Skull Puzzle

Designer
Unknown
Crystal Puzzle Skull on an LED light pedestal
Manufacturer
Manufactured by Jeruel Industrial Co Ltd and available from Play N Learn, www.play-n-learn.com at SGD$15.90. Also available from Grand Illusions. Comes in two versions, the clear one which is shown here and a black(ish) translucent one.

Type & Classification
3D assembly

Dimensions
7.cm (Height) x 5.4cm (Width) x 7.9cm (Depth).

Materials & Construction
The puzzle consist of 48 interlocking pieces made of clear hard plastic. Quality of construction is good and all the pieces fit together nicely with reasonably tight tolerances. No force required. Once assembled, the puzzle pieces are "lock" together in place by a screw rod and the whole assembly feels solid and weighty.


Overview
If my pewter Platypus is the "poor man's Berrocal", then the Crystal Puzzle Skull must surely be the "destitute man's Berrocal".

After reading Moises Reyes' review of the Skull on his blog, I just had to get myself one. And so I did. And so I spent a leisurely Sunday evening assembling the 48 pieces together to form this rather nice looking 3D jigsaw puzzle.

Very therapeutic stacking the pieces vertically one on top of another and watching the Skull slowly take shape. I didn't have to think too much (or at all) building the Skull. Its nice not to be frustrated by dead ends once in a while.

After I had finished the Skull, I even placed it on a pedestal of LED white lights (used for my Betta aquarium) to see how well the Skull would light up. Very nice, but the photo doesn't do the illuminated Skull justice tho'

Difficulty Level
Overall easy if you follow the instructions. If not, its very tough. And if you make a mistake, you will know because the pieces won't fit. However, it does take a fair bit of time to finish the assembly since stacking requires somewhat carefully handling. I also felt that the illustrations of some of the pieces in the instruction sheet could have been better. A number of pieces look similar but are really not so.

Summary
The Skull is one of many 3D jigsaw puzzles from the same manufacturer/distributor, so if you like colourful and cute objects that display well, go for it. Personally I found only the Skull and perhaps a couple of others such as the Apple or Heart appealing, but that's just me. Fellow puzzle bloggers Oli Sovary-Soos has several and Roxanne Wong has the entire collection. And good value for the money too, both from the "puzzling" perspective and quality.

Sunday, 3 March 2013

Lunatic Lock


Name
Lunatic Lock

Designer
Gary Foshee


Manufacturer
My copy was bought from Ebay, a real steal at around US$5/- plus, if my memory is correct. According to the packaging, it was made by Puzzle Makers International, Taiwan. Currently available from several online retailers including Bits & PiecesPuzzleMaster and Serious Puzzles.

Type & Classification
Trick/Puzzle Lock

Dimensions
7.5cm (Height) x 5.7cm (Width) x 1.2cm (Thickness).

Materials & Construction
Brushed aluminium for the lock body and steel for the shackle. Overall quality is slightly above average (for my copy) but everything works properly. Sure, it's not a Popplock..... but hey its also at least fifteen times cheaper!

References
See http://www.puzzle-place.com/wiki/Gary_Foshee. There are at least six puzzle blog reviews on the Lunatic Lock. See also http://www.puzzle-place.com/wiki/Lunatic_Lock


Overview
I must be one of the last bloggers to play with and review the Lunatic Lock. I have had this lock for some time now and only recently discovered it at the back of my puzzle closet.

This trick lock comes without a key nor a keyhole, but has a bolt sticking out underneath the shackle. So the only way to solve it would obviously have something to do with this particular bolt. Took me about half an hour or so of fiddling to figure out the solution.

If you compare it with the Popplock range, the internal mechanism can be considered relatively simple. But because it is hidden (unlike the Popplocks which is more sequential discovery oriented), it makes the solve a little bit more tricky. Nimble fingers and a soft touch would certainly help here.

Difficulty Level
While not a difficult puzzle lock, nonetheless it is no walk in the park by any means either and the beginner/casual puzzler would face some degree of challenge.

Summary
If you are not sure about whether you are going to like trick/puzzle locks, the Lunatic Lock is a very good introduction to the puzzle lock genre. Inexpensive and pain free to try before plonking down serious cash for the (much) more up-scale and very expensive Popplocks.

Tuesday, 26 February 2013

Washington Monument


Name
Washington Monument

Designer
Brian Young


Manufacturer
Brian Young. Puzzle directly available from him via his website Mr Puzzle Australia priced at A$75.90

Type & Classification
Sequential Discovery.

Dimensions
11.8cm (Height) x 6.7cm (Width) x 6.6cm (Depth).

Materials & Construction
Queensland Silver Ash for the Monument , Australian Jarrah for the base, steel, plastic and paper (for the flags). Overall quality and construction of the puzzle is very good, the base especially is very heavy, solid and sturdy. Tight tolerances abound and all moving parts fit well and nicely together.

IPP
The Washington Monument was Brian's Exchange Puzzle during IPP32 in Washington DC, USA in August 2012. It also won third prize for the themed puzzle award. The puzzle "is a representation of the Washington Monument right down to the lightning rod in the top..."

Overview
The object of the puzzle comprises two main steps, the first which is to disengage the Monument from the base. This first step requires the locking of gravity pins in the puzzle. The second step is to re-engage the Monument back into place by unlocking of the gravity pins . Both steps require the use of "tools" that are found within the puzzle to solve it (trademark of a sequential discovery puzzle). The accompanying instructions state that if the Monument is disengaged from its base by chance without the gravity pins locking, then the solution was not intended and this does not count.

Just my luck! Yes, I manage to get the Monument off the base (by chance) without the gravity pins locked in place. With the Monument out unintended, I was able to take a peek at the insides. This is one of the more unusual sequential discovery puzzles I have come across, in the sense that the internal mechanism is totally unique and unlike anything I have seen before in a puzzle.

For a while I pondered how the internals work, examining the various parts. Slowly I began to form an idea of how the puzzle was meant to be solved. I reassembled the puzzle and tried again, with a different approach. This time around, I got the Monument out of the base the correct way.

But the second step of reassembling the Monument proved to be much harder than the first, just as the instructions had indicated it would be. Here is where the tools provided come in pretty handy but some lateral thinking out of the base (box) is required. Quite a long while of fiddling and eventually everything was back in place.

Difficulty Level
Very difficult. Both disassembly and reassembly pose serious challenges. I took well over one and half hours to solve the puzzle fully and correctly. This puzzle is definitely not for the casual puzzler and even more experienced puzzlers may have some difficulty.

Summary
This puzzle is one of the harder sequential discovery puzzles I have come across. This is not one of those puzzles you can repeatedly solve easily tho', at least not for me. The rather unusual internal mechanism I feel doesn't really facilitate straight forward execution of the solution. But then again, perhaps I am just not doing things as correctly as I should.

Notwithstanding, as far as sequential discovery puzzles go, the Washington Monument distinguishes itself for the unique, intriguing and novel mechanism/trick it employs. Still a must-have for the serious collector.

Thursday, 21 February 2013

Gold Coast Parking Meter


Name
Gold Coast Parking Meter

Designer
Brian Young

Manufacturer
Brian Young. Puzzle directly available from him via his website Mr Puzzle Australia. Priced at A$85 but it's really only A$84.90 because the puzzle contains a 10 cent coin...but you will have to break the puzzle to get it out.


Type & Classification
Sequential Discovery. Probably the first time this term is used to classify a puzzle. Since then there have been a host of other puzzles bearing this classification including Fuji 1707, Houdini's Torture Cell, A Plugged Well, Danlock, First Box and Lotus.

Dimensions
16.3cm (Height) x 8.1cm (Width) x 4cm (Depth). Quite a large puzzle as far as size is concerned and fits well in the hand.

Materials & Construction
Yellow Leichhardt for the meter body, Mackay Cedar for the stand and acrylic/plastic for the meter readings. Overall quality of construction, fit and finish is very good. The stand is much stronger than it looks and unless you use total brute force, it is unlikely you will break it or anything else.

IPP
The Gold Coast Parking Meter was Brian's Exchange Puzzle during IPP27 at Gold Coast, Australia in 2007. As IPP27 was held at Gold Coast, Australia this was a themed puzzle. According to Brian, "this puzzle is a representation in wood of one of the Duncan parking meters used on the Gold Coast from the 1960's onwards" 

References
http://www.puzzle-place.com/wiki/Gold_Coast_Parking_Meter

Overview
The object here is to get the 10c INTO the parking meter, not OUT! This is a sequential discovery puzzle; meaning that you execute a series of steps in a particular order with the aid of "tools" found within the puzzle in order to solve the puzzle. No external tools are needed (or permitted).

Based on my own count, there are about 5 steps required before the coin drops into the puzzle. Thereafter, another about 4 steps to reinstate the puzzle back to the unsolved, original state.
In the solved state, the coin has dropped
into the  meter and not visible
Unlike the more recent puzzles of this genre, the genius of this one lies in its simplicity of design and execution. I was pleasantly surprised when I saw the mechanism/trick to the puzzle and how the "tools" are used.

Difficulty Level
For the novice, this puzzle will prove very challenging but for the more experienced puzzler, it is not overly difficult. I took about 15 minutes or so to solve this one, although I was stuck for a few moments in my progress after step 2.

Summary
While the Gold Coast Parking Meter may be the Godfather and pre-date a number of the "modern" and mechanically more sophisticated sequential discovery puzzles in terms of design and materials used, nonetheless, from a puzzling aspect, it still manages to provide sufficient fun and challenge with a-ha moments. Well worth acquiring if you like this particular genre of puzzles as much as I do.

Saturday, 16 February 2013

The Rattle

Name
The Rattle.

Designer
Stewart Coffin

Manufacturer
Eric Fuller. Website www.cubicdissection.com. 35 copies were made, each priced at US$64, but all have been sold out.

Type & Classification
3D packing puzzle (with a twist)


Dimensions
6.7cm (Length) x 6.7cm (Width) x 3.9cm (Height)

Materials & Construction
The box is made from Canarywood, Marblewood, Quilted Maple, Bamboo and Acrylic. Eight loose pieces of different shapes made of different exotic hard woods; Ipe, Bocote, Ash, Purpleheart, Ebony, Yellowheart, Paduak, Rosewood. Construction fit and finish is excellent. The Rattle is built to very tight tolerances as one will discover once playing starts. 

IPP
Henry Strout's IPP29 (2009) Exchange Puzzle in San Francisco

References
See http://www.puzzle-place.com/wiki/The_Rattle


Sorry, no photo of solved box as the arrangement of the
pieces seen through the acrylic will give away too many clues
Overview
The object is the pack all seven irregular shaped individual pieces into the box through a rectangular slot at the corner of one of the sides...with no protrusions (see photo below). Unlike the more traditional style packing boxes, this one comes with two transparent surfaces (made of clear acrylic) adorning the top and bottom. This gives a very clear view of the (colourful) pieces inside the box. The eighth piece, an L-shaped Yellowheart cannot be removed and remains inside the box.

The 1 x 2 vertical slot for inserting the wooden pieces.
The little round "circle" at the top corner is the Bamboo
reinforcement to strengthen the structure of the box
To solve the Rattle, two major hurdles have to be overcome; firstly, getting the loose pieces into the box taking into account the Yellowheart piece that is trapped inside. Secondly, because the tolerances are so incredibly tight, this severely limits the manoeuvrability of the various pieces inside the box. You may not be able to turn or rotate the pieces easily, especially once the box has been filled with some pieces already. Thus, careful planning on how to insert the pieces in which particular order and deciding the ones that need rotation is crucial.

Difficulty Level
Very challenging and difficult but not frustratingly so. It took me two evenings to figure this one out. One way is to think outside the box...literally...ie play with the pieces outside the box to get a sense of how the pieces may be orientated and arranged (but don't forget to make space for the Yellowheart). This would minimise the headaches of later trying to extract a piece  from the box that was wrongly inserted or rotated, which can be quite arduous given the the tight tolerances of construction.

Summary
Overall, a very nice well made 3D packing puzzle. From a puzzling stand point, a rather unique and different way to pack pieces into the box which adds greatly to the challenge. A lot of aesthetic appeal given the contrastingly colourful hard woods can all be clearly seen through the top and bottom lids. In the solved state, the Rattle displays very well.

Friday, 8 February 2013

Photo Gallery Of Puzzles On Facebook


I have just created a Facebook page which contains various photos of the puzzles reviewed in my blog as well as those yet to be puzzled with and reviewed. Please click on the link below:

https://www.facebook.com/MechanicalPuzzles

I am still adding to the albums, especially the Revomazes which are still wrapped in their boxes.

This Facebook page will be a work in progress as I continue to add photos whenever I acquire new puzzles from time to time.

Wednesday, 6 February 2013

1 € Labyrinth Puzzle

Name
1 € Labyrinth Puzzle

Designer
Robrecht Louage.

Manufacturer
Robrecht Louage. Puzzle directly available from him via his email found on IPP32 site. Priced at 20€ but it's really only 19€ because you get 1€ back from the puzzle...if you manage to get it out that is.

Type & Classification
Maze; Route Finding.


Dimensions
18.6cm (Length) x 7cm (Width) x 1.5cm (Thick)

Materials & Construction
Trespa (a very strong and durable composite laminate made of resin reinforced by cellulose fibres generally used for interior table tops), transparent acrylic, steel ball bearing and screws. Like all of Robrecht's previous puzzles, quality, fit and finish here is very good. Looking through the clear acrylic panel, the maze inside appears to be very nicely and finely cut by laser. The choice of materials used is in my opinion very suitable for this type of puzzle; in terms of quality and durability versus affordability.

IPP
The 1€ Labyrinth Puzzle was a competition entry in the IPP32 Nob Yoshigahara Puzzle Design Competition in Washington, USA, 9-12 August 2012. Robrecht's 4 Step Visible Lock won the Jury Grand Prize at IPP31 in Berlin the previous year.

Overview
This puzzle came to me courtesy of Robrecht and is his 4th puzzle in my collection. The other three are the 4 Steps Visible Lock, Remove The Yoke and La Cerradura Doble all which I have reviewed previously in this blog.


In some ways similar to the 4 Steps Visible Lock, the object is to extract the 1€ coin from puzzle. To achieve this, you have to move the acrylic panel left and right by navigating a ball bearing through a maze inside. I found the 1€ Labyrinth much harder and trickier to solve. It took me nearly an hour whereas the 4 Steps Visible Lock was solved under fifteen minutes. The added difficulty was the fact that the maze is only partially visible and sometimes you will lose sight of the ball bearing.

Difficulty Level
Challenging and tricky but not unduly difficult. Those who have solved the 4 Steps Visible Lock would probably find it easier as there is a similar step involved.

Summary
Overall, a puzzle that is fun to solve and one which can be solved repeatedly (and quickly) once you know the trick/mechanism involved. For a rather well made puzzle, it is also very reasonable priced and value for money. The puzzle will make a nice addition to any collection. But the 4 Steps Visible Lock still remains my top favourite of the four puzzles mentioned.

Wednesday, 30 January 2013

Stacks Of Sticks

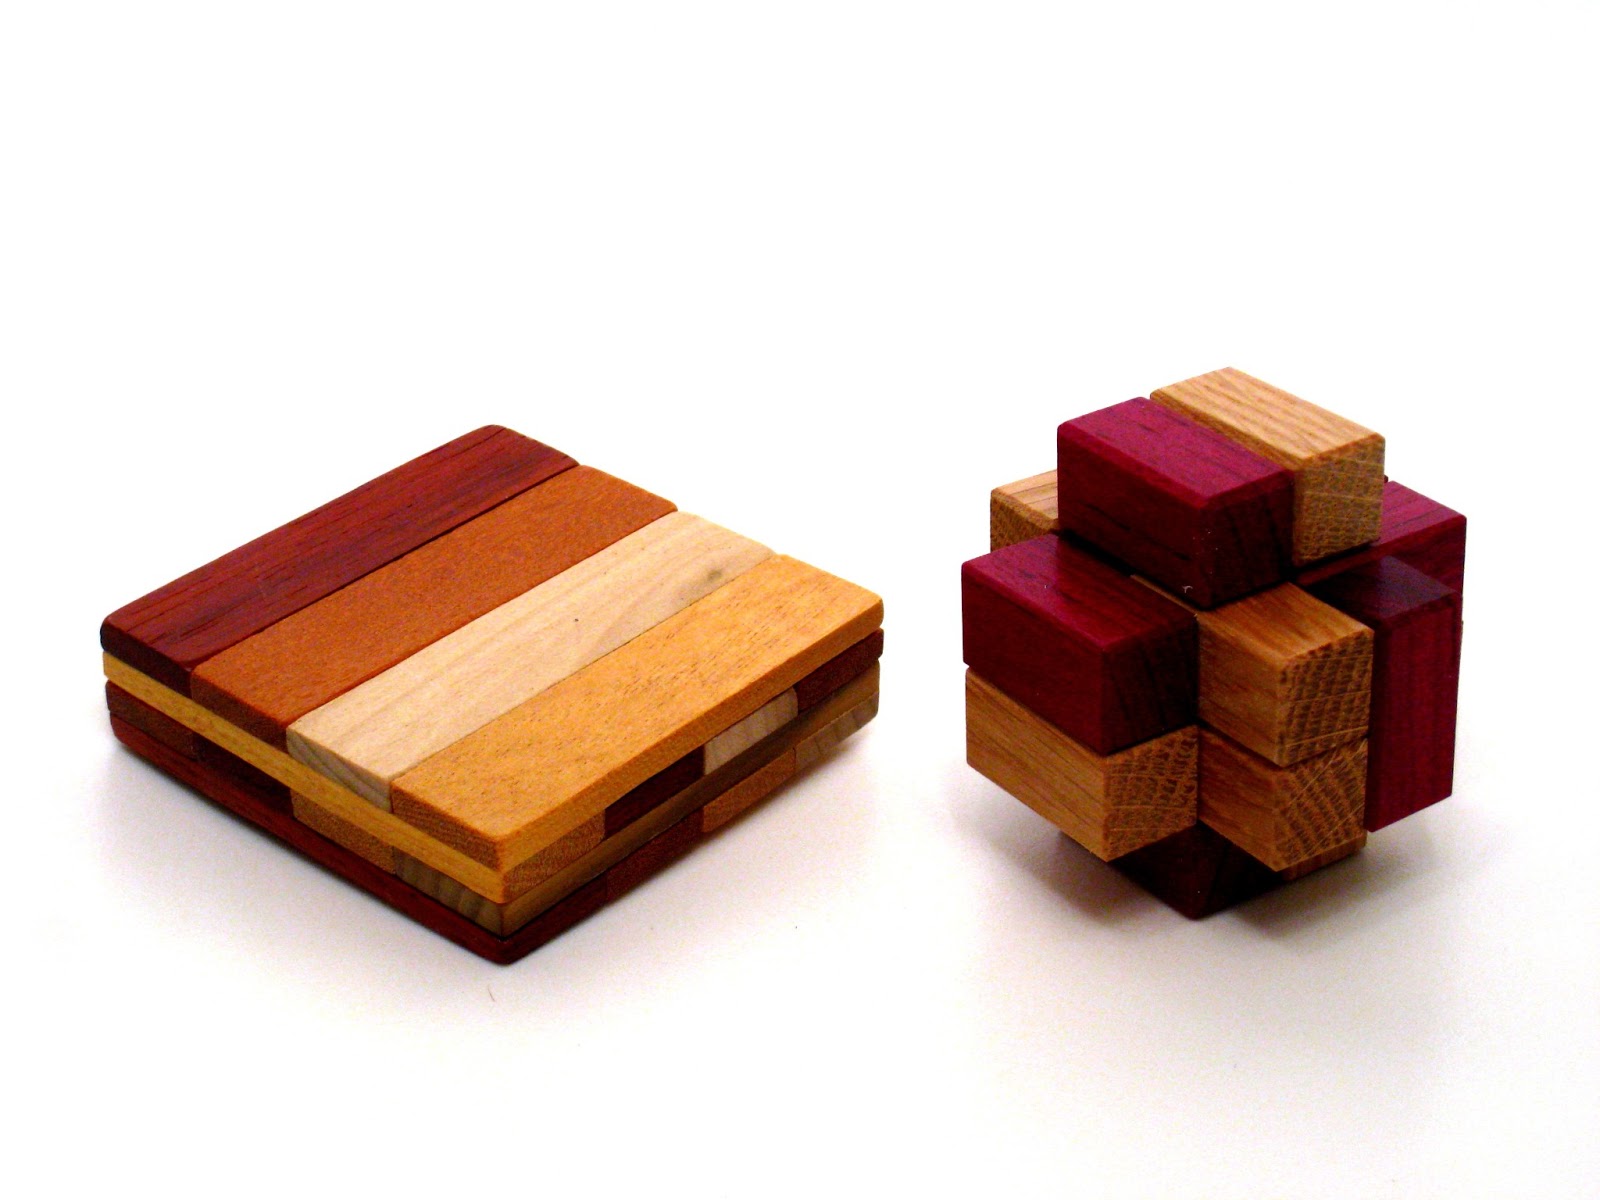
This flattish wood puzzle came to me from Brian Menold of Wood Wonders. Called the Stacks Of Sticks, it is exactly what the name says. 16 strips comprising of 4 different varieties of exotic hardwoods (Paduak, Yellowheart, Wenge and East Indian Rosewood) stacked together in four layers to make up this rather colourful little puzzle.

The puzzle measures 6.6cm square with a thickness of 1.8cm. Quality of construction is good and finished to tight tolerances. The object of the puzzle is to take apart the stack and reassemble them. As Brain rightly points out on his website, the puzzle looks simple...and yes it is. But looks are deceiving as I soon found out.

Stacks Of Sticks (left) with the 4-piece burr gift with purchase
Because of its tight construction which gives no hints whatsoever, it took a bit of playing for me to figure out how to disassemble the stack. Quite tricky I might add. Overall it is not a difficult puzzle but still provides some challenge.

One of the really plus points about the Stacks Of Sticks is that it is a good value for money puzzle at US$15. On top of that, Brian threw in a free gift (I think for first-time buyers only)...a miniature four piece burr made from two hardwoods, one of which I am pretty positive is Purpleheart. The burr is only 5.2cm cube, small and cute and well made. It also appears fairly easy to take apart. But given my lack of experience with burrs, I did not venture further to disassemble the burr fully, just sliding the pieces enough to see what each looked like.

Readers may like to check out Brian's site which sells a variety of wooden puzzles, a number of them designed by Stewart Coffin. And like the Stacks Of Sticks, they are pretty reasonably priced and affordable.

Saturday, 26 January 2013

Topless Box

The Topless Box is one of Eric Fuller's recent creations. I like the name Eric has given to this puzzle. Nope!....not for the type of imagery typically associated with "topless" but rather, I find that the word "topless" describes the puzzle very well.

The Topless Box comes with a rather interesting history of how Eric came to produce this box as part of an ongoing massive project for the construction of an Apothecary style puzzle box. I guess there would be more on the latter in time to come.


Measuring 7.7cm x 7.7cm x 7.7cm, the box is made of three exotic hardwoods; Striped Quartersawn Sapele for the body itself, Quilted Maple and Paduak for the top and bottom "lids". Quality of construction and attention to detail is excellent and the box is built to very tight tolerances. Eric has also mentioned that the boxes "are designed with longevity in mind, and should function fine regardless of humidity".

As a bonus, there is also a very pleasant woody smell emanating from the woods, which even runs to your fingers after you have played with the box for a while.  The box is about the right size and fits the hands very well, so less fear of slipping and dropping and denting a corner.

Lids removed but box is still closed!
The object is of course to open the box. Well, here's the reason why its "topless". The cream coloured Quilted Maple top and bottom surfaces are actually lids that can be removed quite easily....no trick here. Underneath the Maple is a contrasting layer of Paduak which fits into the depression in the box body, when the box is fully assembled. But the box itself is still sealed at both ends by a Paduak covering. Clearly there is more that needs to be done than merely removing both lids.

I have limited experience with puzzle boxes and I would say that the Topless Box is very challenging indeed. I would not go into any details here as I do not wish to give away any secrets...let's just say that from a puzzling perspective, I don't think this box fits into the usual genres of puzzle boxes in terms of the solution. (if any reader think this statement is inaccurate, please let me know). It took me the better part of a whole evening before I figured out the mechanism and opened the box.

Overall, a very nice box puzzle with a very interesting and unique mechanism, one that was unexpected, at least for me when I saw the insides. Like all of Eric's wooden creations, I was fortunate to get an order in in-time before they ran out. Expensive but worth the money. You may also like to check out Oli's blog post for his views on this puzzle.

Saturday, 19 January 2013

Ball In Cylinder Puzzle No.1

UPDATE  30 SEPT 2017 - Production of BIC#1 has ceased indefinitely. But Ball In Cylinder #2 is now AVAILABLE again! Please email me at smallpuzzlecollection@gmail.com to purchase.

Update 23 October 2017 - Dear Reader, please check out my new puzzle blog and e-storat http://mechanical-puzzles.com


Sometime last November, I decided to have a go at puzzle designing. While I wanted to see if I could actually come up with something that could remotely be considered a mechanical puzzle, this was also to determine if my design could actually be produced, and if so, whether it could be made out of metal.

There were three main hurdles I had to overcome:-

1. Come up with a functional mechanical puzzle design; one that actually works.
2. Source for aluminium and be able to buy it cheaply
3. Find a metal fabricator who could produce a single prototype at a reasonable cost

I already had in mind what sort of puzzle I wanted to design and with the help of MS PowerPoint (no CAD etc here) challenge No 1 was quite easily disposed off. Google proved to be very helpful and I readily located an aluminium supplier that was prepared to sell me a small quantity of rods and tubes of the required sizes cash and carry. It was finding a suitable fabricator that proved to be the most difficult of the three. While there are certainly no shortage of vendors, few if any were keen to do personal projects, instead preferring to do more profitable commercial work.

I asked and searched around quite a bit and nearly gave up this whole idea when by a stroke of luck, I was referred by an acquaintance to a small metal engineering business located only minutes away from my office. I was in luck. The proprietor, a kindly elderly gentleman, was willing to make a single unit prototype after looking at my design. It took a bit of effort to explain to him what mechanical puzzles were and what I was trying to achieve. He was rather amused and decided to go along with me. (The next time I visit him, I will remember to bring along Wil Strijbos' Lotus! I am sure this would definitely blow him away). And the price quoted was also pretty affordable. This gave me hope since making more units would lower the price.

To cut a long story short, my first puzzle produced was the RevoLUTION Ball Puzzle. I made only one copy. While the aluminium itself was easy to find, some of the parts that I needed were not, and our dear old metal fabricator (he is in his late 60s) was too busy to source them for me. I also felt the specifications needed changing, eg much larger ball bearing, less moving parts etc. Notwithstanding, I was satisfied with this first exercise of design and production. I had found a fabricator willing and capable of making metal puzzles. Apart from metal, my fabricator could also work with heavy plastic, nylon and ABS, but not wood.

During this time, I was also concurrently working on my second design, the Ball In Cylinder Puzzle (BIC). I wanted my second puzzle not only to provide a reasonable amount of challenge but also be aesthetically pleasing. Compare the BIC to the RevoLUTION Ball Puzzle physically and you will know what I mean. Inspiration was drawn from Wil Strijbos' metal puzzles and some others.

For my BIC to work properly, it had to be of a certain size. My reference point was the Revomaze and AlCyl, the latter reviewed in this blog. Anodising was expensive and out of the question, so I settled for a polished look instead. I had tried out the first and second prototypes on my friends (tho' unfortunately none were puzzlers) but the feedback was pretty positive.

Ball In Cylinder Puzzle Prototype No 1 on the right and No 2 on the left.
No 1 was a whopping 70% larger by volume than the No 2. Notice
also the missing etched lines at both ends of No2 which are found on the final design (top photo) 
After minor tweaks through three prototypes, I finally settled on my final design and took the plunge to order a batch of fifteen copies. The true test is really what the experts have to say....so I sent about half of these to experienced puzzlers and bloggers in the community (including Wil Strijbos) to see what they thought of my first production puzzle. Thankfully they reported positive and encouraging comments on their blogs and I got valuable feedback. I actually sold out the remaining half within a night, after Kevin's review was posted on his blog. Unfortunately I also had to put other prospective purchasers on a wait list.

My BIC is made entirely from 6061 aluminium (I don't know what these numbers mean but mountain bikes appear to use similar aluminium as well). It measures 7.5cm tall with a diameter of 4.44cm and feels weighty in the hand.

The object of the BIC is to remove the hidden ball bearing inside the cylinder. It is classified as a sequential movement puzzle. As the BIC is my own design, I am not sure how to grade it's difficulty. Allard in his blog review states the BIC "will provide a nice little challenge" while Kevin feels it has "just the right level of difficulty". For other reviews, please see Roxanne's blog post and Oli's comments on the Revomaze Forum.

In the meantime, I am onto my third puzzle design and this one will go for prototyping very soon. Will let everyone know once its ready.

Update: 29 January 2013

The prototype for the new Ball In Cylinder Puzzle No.2 has been fabricated and looks good. Now undergoing testing and tweaking the specifications to make sure it works properly as intended.

Update: 11 June 2013

Ball In Cylinder No.2 first four puzzles delivered. Now to check that each puzzle works properly. Once the rest of copies produced, will make available for sale via this site.


Saturday, 5 January 2013

Bolt & Washer

The Bolt & Washer puzzle was designed by Wil Strijbos. He was out of stock for quite a long time, so when it became again available recently, I snapped one up immediately.


This bolt puzzle is rather different from the rest in this genre due to its unusually large size. It measures a hefty 7.6cm long and 3.7cm wide. Made from steel, it feels heavy in the hand. Quality of construction and finish is good but don't expect it to be milled to the type of precision and tolerance as the Lotus or Cube Dovetails.

The object of the puzzle is to remove the washer from the bolt. To do this, the only obvious way is to remove the nut. The nut is also not your run-of-the-mill version as it has what appears to be a rod running through the side.

Unlike the typical bolt and nut puzzles, this one is a sequential discovery puzzle; meaning that you have to follow a number of steps in sequence with the aid of certain tools that come with the puzzle which you first need to discover.

From my perspective, there are 6-7 steps (depending on how you count) to getting the washer out. While not overly difficult, the puzzle does provide a good amount of challenge. I managed to solve mine within 15-20 minutes. The trick of the mechanism in the puzzle although pretty simple once you see it, is actually quite clever.

Overall a very nice bolt and nut puzzle with a slightly different twist. For puzzlers who like nut/bolt/washer or sequential discovery puzzles, this is a gem and definitely worth acquiring. Available directly from Wil Strijbos.

Sunday, 30 December 2012

Lotus

Update 23 October 2017 - Dear Reader, please check out my new puzzle blog and e-store at http://mechanical-puzzles.com

The Lotus puzzle is the latest (and much awaited) new puzzle from Wil Strijbos. According to Wil, the Lotus is based on his earlier Yen Puzzle which he invented some twenty years ago. The Yen Puzzle was made of wood and the goal is to remove a Japanese yen coin with a nail running through it.

Forward twenty years to the present and the incarnation of the Yen Puzzle is the Lotus, made of precision machined aluminium and anodised blue. The object of the lotus has not changed; instead of removing a Yen coin, now its an aluminium circular disc instead, with a rod running through the centre.


Yen Puzzle; photo courtesy of Wil Strijbos
The Lotus measures 11cm x 5.4cm x 1.9cm. Very weighty and solid, there is no feeling of any hollow inside. The puzzle looks like it has been milled from a solid block of aluminium. The entire puzzle is made up of two main portions dovetail joined together.

Construction and quality is of the usual excellent Wil Strijbos standard. With the anodising in blue, the Lotus is the epitome of a fine and premium quality metal puzzle. Etched onto the the puzzle on one side you will notice the word "Lotus" and Wil's signature; the latter which now appears to be a hallmark on most of Wil's anodised metal puzzles, for example the First Box, New Aluminium Dovetail and  Cube Dovetails.


It took me about half an hour of fiddling and pondering before I figured out the solution to removing the disc. Very clever trick indeed! But one cannot help but wonder if there is anything more than this, given the physical appearance and rather elaborate construction of the puzzle.

Wil had mentioned in his newsletter that the Lotus holds other secrets not found in the original Yen Puzzle. However he also requested a "gag order" from us puzzle bloggers not to reveal the extra surprises so that "other solvers will be happy with the AHA moments when they find the secret(s) by themselves".

I shall not say any more lest I give anything away that will spoil someone else's fun with the Lotus. I am not even going to mention what sort of genre this puzzle belongs to (...so don't bother looking at the blog tags). But let me just say this...this is one of the best, most interesting and fun puzzles I have come across. And believe me, even though it may be pretty expensive, it is worth every cent, not just because of its quality, but more importantly, for the puzzling experience.

My advice to all readers is this - until you can explain why the puzzle is named "Lotus", you have not FULLY SOLVED the puzzle. Have Fun!

But if you are seriously stuck as a number of puzzlers have been, you're most welcome to PM me via my blog email and I will be more than happy to take you through the steps to reach the end. Trust me, its pretty complicated.

And finally, here's wishing all readers A VERY HAPPY NEW YEAR!


Saturday, 22 December 2012

Popplock T7

If you thought that Rainer Popp's puzzle locks could not get any bigger than the humongous T5, think again! Weighing in at a massive 1.1kg, Rainer's latest creation, the T7 is a behemoth. Measuring 12.6cm high, 6.4wide and 3cm thick, its taller and 200 grams heavier than the T5. The T7 has a rather unique octagonal cross-sectional shape with a steel button on one of the sides and a round knurled knob at the base of the lock.


The lock body is milled from a solid block of brass while the shackle is stainless steel. Like the rest of the Popplock family, build quality, fit and finish is first class. Once the lock is opened, you will also discover that the attention to detail in the construction of the inside is really incredible. From an aesthetic standpoint, both externally and internally, this is probably one of the most beautifully and intricately made puzzle locks I have come across.

From a puzzling perspective, I found the T7 much easier compared to its earlier cousins. I managed to release the shackle within minutes rather than hours. The solution to unlocking the lock has to do with manipulating the knurled knob at the bottom. Puzzlers who are familiar with the Revomaze would know exactly what I am talking about.

An additional feature, which I thought was rather clever and a real plus is that the T7 can be modified to make the solution varying degrees harder. The T7 comes equipped with all that is necessary for the owner to make it as easy or as hard to solve as he/she chooses. Oli has dealt with this much more extensively in his review of the T7 so I will not duplicate the details here. As always, Popplocks are not cheap, and the T7 is no exception.

The T7 is quite a radical departure from the earlier Popplocks. All the earlier models I have played with; the T2, T3, T4, T5 and T6 have one or more clever "tricks" involved. The T7 I felt, unfortunately lacked the typical Popplock surprises one has come to expect.

A number of puzzlers in the community also felt let down by the T7, especially given the very expensive price tag that it came with. However, I would like to mention that these puzzlers probably have been saturated and "spoilt" by the Revomaze and hence understandably consider the T7 not up to standard. My humble opinion is that if there were no Revomaze in existence today, I am pretty confident that the T7 would likely have been considered by many as one of Rainer's best creations. Despite the seemingly unavoidable T7-Revomaze comparison, I think most puzzlers would agree that the solution to the T7 (or any puzzle lock for that matter) is quite imaginative and unexpected.

Personally I have only one criticism of the T7, and that is perhaps Rainer could have made the lock a much harder solve to begin with; then at least there would have been a fair amount of challenge expected from a typical Popplock, never mind the lack of trick(s). Aside from this and notwithstanding the less than positive comments from some quarters, I still consider the T7 to rank up there with the rest of its brethren. Expensive? Yes. Worth the money? Yes. Collectible? Definitely.


Saturday, 15 December 2012

Jugo Flower

A year and a half ago, I ordered one of Wil Strijbos creations, the Jugo Flower. While waiting for it to arrive, Allard Walker happened to write about this puzzle on his blog and I was given some idea as to how the puzzle was supposed to work. Quite a fair bit of mathematical theory I might add (which is way out of my league) but if you are interested, check out Allard's review on his blog.


For some reason after the puzzle arrived, I left it on the back burner and busied myself with other puzzles that I had acquired around the same time, only to have forgotten about it until very recently. I was spring cleaning my puzzle cupboard when I found the Jugo Flower inside the original round box it came in, with the petals having lost some of their shine.

The Jugo Flower (a.k.a Game Jugo) is about 13 cm across in diameter and shaped like a flower with 15 "petals". The petals are made of brass and connected to a rotatable aluminium hub. 12 of the petals each have one of the 12 Chinese Zodiac animal symbols etched on them, while the remaining 3 petals have the Chinese characters representing Fortune, Wealth and Longevity.

4 petals aligned with the 4 arrows turning over together at the same time
Quality and construction of the puzzle is very precise and first rate. But despite this, the puzzle feels rather fragile, especially at the connecting points between the petals and the hub. Atop the hub are four small arrows and when the arrows are aligned with the petals, the corresponding petals can all be flipped over simultaneously. The Jugo Flower came in the solved state. The object of the puzzle is to "scramble" the petals by flipping them over (by rotating the hub) and get all the petals flipped back to the solved position.


I randomly flipped most of the petals over and tried to get them back in the original order but I could see that this was no easy task. At any one time, all four petals would flip together. Very easy to scramble but difficult to unscramble. I got most of the petals right side up but always, four would invariably remain upside down. The way the Jugo Flower functions reminded me of my Puck Puzzle, which has a somewhat similar style mechanism. I must admit I lost patience after a while and eventually gave up. I guess twisty type puzzles just don't appeal much to me.

Overall a very nice (and very rare) collector's puzzle and I don't regret paying the (very expensive) price to own one...unfortunately, from a puzzling aspect, not really my cup of tea.

I think the Jugo Flower may still be available from Wil Strijbos although I can't be sure. So if anyone is interested, please email me via my profile me for his contact.

Friday, 30 November 2012

Boston Subway

The Boston Subway was super-prolific puzzle designer Oskar Van Deventer's IPP26 Exchange Puzzle. My guess is that the design and name of the puzzle was in keeping with the theme of the host city of IPP26, Boston, USA in 2006. The Subway was designed by Oskar but made by George Miller. I won this puzzle recently in an auction held on www.puzzleparadise.ca.


The Subway is a very cute pocket-sized maze puzzle, which was what attracted my attention in the first place. Measuring a very handy 9cm x 7.5cm x 1.5cm, it is made up of five layers of clear acrylic joined together. Atop the puzzle is a little red "rod" or magnetic wand which is used (from the outside) to navigate a very tiny magnetic disc inside the maze from the start point to the end point, from HOME to WORK and back HOME.

This is a 3-dimensional maze consisting of an array of both vertical and horizontal paths as well as side-way channels, no curves, but just like a real city subway system with all its levels, walkways and lifts. Although my copy came to me second-hand, the quality of construction and finish is very good.


This puzzle is very challenging since the clear layers of acrylic make it very hard to see the various paths, channels and openings clearly (no pun intended) and the disc being so small. For me, it was quite a bit of strain on the eyes. I fiddled with the puzzle for a pretty long time, dragging the disc all over the maze with the wand, trying to reach my destination but got nowhere.

The fact that the disc sometimes just froze at some of intersections of the the channels and openings didn't help either. Was it electrical static that caused the disc to get stuck now and again? I am not sure. In the end, I solved it by referring to the solution. I later discovered that playing with the maze in front of a computer screen in a dimly lit room showed up the maze's paths very much more clearly!

I asked Oskar why a magnetic disc was chosen (given the kind of difficulty I faced) instead of perhaps using a small ball bearing, which to me seems a better choice. Oskar replied that his original version was to use a ball bearing but implementing the disc was George's idea. Anyhow it was felt that the disc involved less dexterity and more control with the wand. Well, who am I to argue with Oskar anyway?

Not easy to solve given the maze design and materials used and also the requirement of the wand to move the disc around. I wish I could pry open the acrylic layers and replace the disc with a ball bearing but that would mean an irreversibly damaged puzzle.  Nevertheless a uniquely themed maze and certainly a rare and collectible puzzle.

Saturday, 24 November 2012

Confounded Container

This nice little metal box puzzle came to me from Ebay. From its appearance, it has a vintage look and feel to it. Made by Bits & Pieces, the box is made of brass. Measuring 7cm x 5cm x 1.7cm, it resembles a pill/medicine box.


The top of the box is adorned with some sort of Celtic design to make it look unique. The box and accompanying literature bear no clue as to when it was produced but my guess is it was probably manufactured in the 1980s (I could be wrong though). Quality and construction is decent although the external surface has tarnished with age. In the hand, the box feels pretty solid and weighty.


The object is to remove the lid, which held down and "locked" in place. Not a difficult puzzle and I figured out the solution within a couple of minutes. (Clue:- it has the same solution as the YOT puzzles). There is enough space within the inside to hold small items.

This box seems pretty rare as I could not find any information or photo on it from the Internet. Nonetheless, a nice collectable (and functional) item!

Monday, 19 November 2012

RevoLUTION Ball Puzzle


This is my 100th post!!!

How time flies since my first post over a year and a half ago. For this post, I have decided (instead of the usual puzzle review) to showcase a puzzle of my own creation; something that I designed myself.

This puzzle of mine is inspired by the genre of the hidden maze puzzle, the latter which usually consist of a blind maze, the object of which is to navigate a marble or ball bearing from a start point to an end point.  Examples of such puzzles are the Lost Marble Puzzle and Magic Dice. The most famous of all the hidden maze puzzles in recent years is of course none other than the Revomaze.


Externally my puzzle appears to resemble a Revomaze Silver Extreme. It is approximately 10.5cm long and slightly over 3.5cm in diameter. It is made of aluminium and steel. But here’s where any similarity ends. Unlike the Revomaze series which all have extremely difficult to solve and intricate hidden maze designs, my little project is rather simple and very amateurish. 

I managed to source aluminium cheaply from a local supplier and by good fortune, a metal fabricator willing to produce a single unit of my puzzle at a very reasonable price.

The puzzle consists of 6 circular discs, each approximately 1.2cm thick and stacked together to form a cylinder shape. The discs are held together with an extended steel screw rod running through the discs and secured at the other end by two nuts. 


The object of the puzzle is to navigate a 6mm ball bearing from a side hole in the topmost disc, through each of the stacked discs and out through a similar side hole at the bottom disc. The discs are able to rotate freely and to navigate the ball bearing, you turn each disc to allow the ball bearing to pass through, from one to the next. Each of the discs has a hole drilled through and the trick is to align the holes to form a “passage” for the ball bearing to pass. 

Dexterity is required here since you will need to rotate the discs to feel (and hear) the ball bearing drop from one disc to the next. To make the puzzle much harder, I drilled some “blind” holes on each of the disc, so that if the ball bearing falls into a blind hole, you will need to turn the puzzle upside down to let the ball bearing fall out to re-start again. This has actually made the puzzle a lot more difficult than necessary as I can testify to.

This is my first puzzle design project and I am quite happy I managed at least to get a prototype unit produced that actually works.

I have just finished a second puzzle design and its now in the hands of my fabricator friend. This puzzle involves a ball bearing inside a cylinder that needs to be removed (and no, it’s nothing like Wil Strijbos’ Aluminium Cylinder Box or Washer Cylinder; I am not even remotely close to such genius).

Many thanks to Erhan Cubukcuoglu of Puzzlehan for his comments and advice on puzzle making and hidden mazes.

Update (19 January 2013) - My second puzzle design, which I call the Ball In Cylinder Puzzle, has been produced. Details can be found HERE.

Friday, 16 November 2012

Coke Bottle #1

Update 23 October 2017 - Dear Reader, please check out my new puzzle blog and e-store at http://mechanical-puzzles.com

I was never really into impossible objects, usually just treating them as more of items for viewing amusement. But after solving Wil Strijbos' IPP32 Exchange Puzzle, I found that I actually enjoyed playing with the puzzle very much. Hence I decided to put in an order for three of Wil's Coke Bottle puzzles. The first one reviewed here is the Coke Bottle #1. There are, it appears a total of ten Coke bottle puzzles in the whole series according to Allard.


Like most of Wil's bottle puzzles, this one consist of a standard 250ml empty Coke bottle, within which sits a red plastic rod. The end at the bottom of the bottle has a screw and bolt through it; this prevents the rod from being removed through the narrow mouth of the bottle. Inside the bottle is also a large steel ball bearing. The object here of course is to extract the ball bearing, which is blocked from coming out of the bottle by the rod.

The whole bottle set-up looks rather simple, but I had read the prior reviews of Oli and Kevin and it appeared that this bottle puzzle was going to be anything but easy. It took me the better part of a whole evening before I managed to figure out the four steps needed to get the ball bearing out. The solution (while on hindsight seems simple) is nonetheless tricky and quite unexpected.

As with such puzzles, a fair amount of dexterity is also required, apart from just analysing how the puzzle could be solved.  I found re-assembly of the puzzle to be just as hard if not harder than the solving but managed to return the bottle to its original state after some time. As I understand, this is one of Wil's easier bottle puzzles, so I expect to have a much harder time with my other two Coke bottles. So stay tuned!